4 Development and Deployment of a .NET Stored Function Demo

These topics demonstrate how to develop and deploy a .NET stored function.

See Also:

Oracle Developer Tools for Visual Studio Help for further information for further information about these components

Overview of .NET Stored Function Demonstration

This demonstration uses Oracle Developer Tools for Visual Studio extensively although some processes can be performed with other Oracle tools. Also, the demonstration refers to the following components of Oracle Developer Tools for Visual Studio:

  • Oracle Explorer

  • Oracle Project

  • Oracle Deployment Wizard for .NET

In this demonstration, you will develop and deploy a .NET stored function named GetDeptNo, with a PL/SQL wrapper, GETDEPTNO. The GetDeptNo function accepts an employee number (EMPNO), performs a query, and returns the department number (DEPTNO) of the employee.

Step 1: Create the GetDeptNo Function and Build it into an Assembly

This demonstration begins by opening Visual Studio, creating a function, and building it into an assembly.

  1. Open Visual Studio and connect as scott/password. See Oracle Developer Tools for Visual Studio Help for information about connecting.
  2. From the Visual Studio menu, select File, then New Project.
  3. To create an Oracle Project template, select the project type Visual C# Projects, and select Oracle Project.
  4. Name the project CLRLibrary1 and provide a location for it.

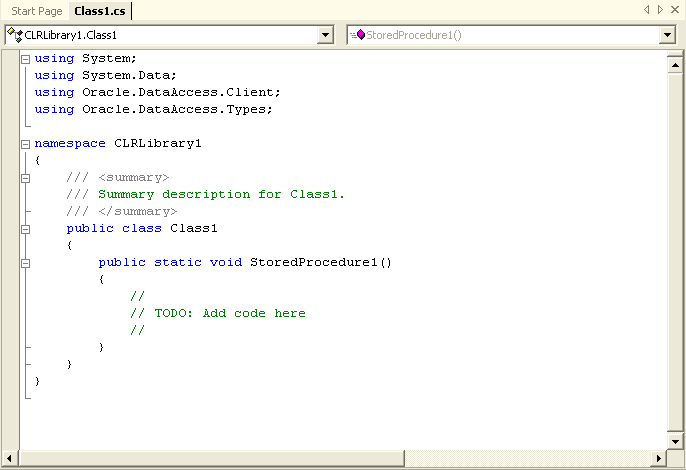
    A class named CLRLibrary1.Class1 appears. It contains a template for a stored procedure.

  5. Copy the following code over the base class and save.
    using System;
    // use the ODP.NET provider
    using Oracle.DataAccess.Client;
    using Oracle.DataAccess.Types;
     
    namespace CLRLibrary1
    {
      // Sample .NET stored function returning department number for 
      // a given employee number
      public class Class1
      {
        public static int GetDeptNo(int empno)
        {
          int deptno = 0;
     
          // Check for context connection
          OracleConnection conn = new OracleConnection();
          if( OracleConnection.IsAvailable == true )
          {
            conn.ConnectionString = "context connection=true";
          }
          else
          {
            throw new InvalidOperationException("context connection" +
              "not available");
          }
     
          conn.Open();
          // Create and execute a command
          OracleCommand cmd = conn.CreateCommand();
          cmd.CommandText = "SELECT DEPTNO FROM EMP WHERE EMPNO = :1";
     
          cmd.Parameters.Add(":1",OracleDbType.Int32,empno, 
            System.Data.ParameterDirection.Input);
     
          OracleDataReader rdr = cmd.ExecuteReader();
     
          if (rdr.Read())
            deptno = rdr.GetInt32(0);
     
          rdr.Close();
          cmd.Dispose();
          conn.Close();
     
          return deptno;
     
        } // GetDeptNo
      } // Class1
    } // CLRLibrary1
    
  6. From the Build menu, select Build Solution or Build CLRLibrary1.

    This builds the code into an assembly.

  7. Save.

Step 2: Start the Oracle Deployment Wizard for .NET

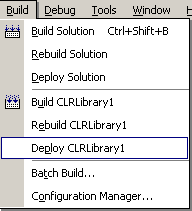
Oracle Deployment Wizard for .NET can be started from the build menu.

  1. From the Build menu, select Deploy CLRLibrary1.
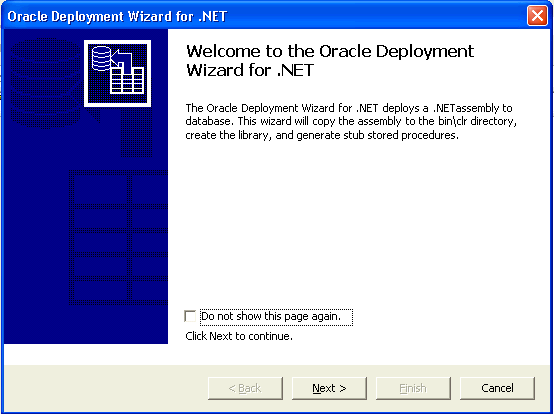
  2. When the Welcome window appears, select Do not show this page again, if you want.
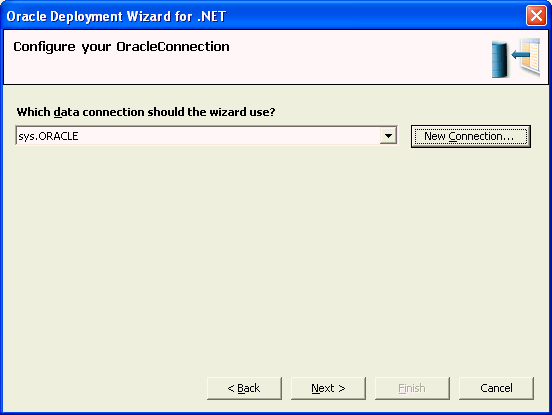
  3. The Configure your OracleConnection window appears.

    Choose your connection from the drop-down list, and click Next or click New Connection, if you are not connected.

    You must choose or add a SYSBA connection.

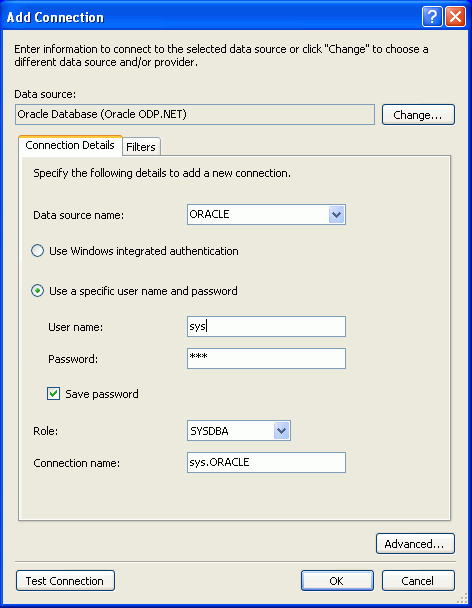
  4. If you have selected New Connection, the Add Connection window appears.

    In the Connection Details tab, select the Data source name from the drop-down list.You can select an option to Use Windows integrated authentication or an option Use a specific user name and password, and enter that information.If you want, select Save password.The option for Role shows SYSDBA, which is the only available option.If you want to test the connection, click Test connection.Click OK,

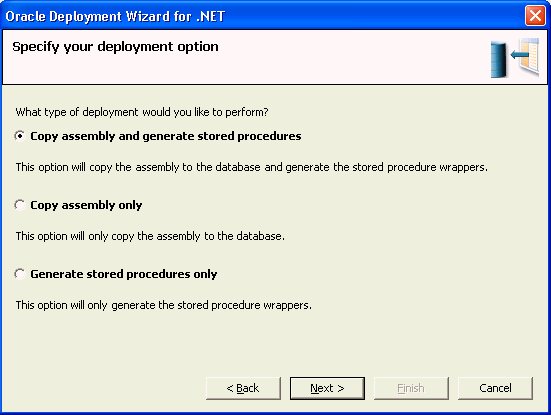
  5. The Specify your deployment option window appears.

    The first time you run the deployment wizard, select Copy assembly and generate stored procedures. If you later modify your function or stored procedure, you can run the deployment wizard again, and choose to perform just one of these operations.Click Next.

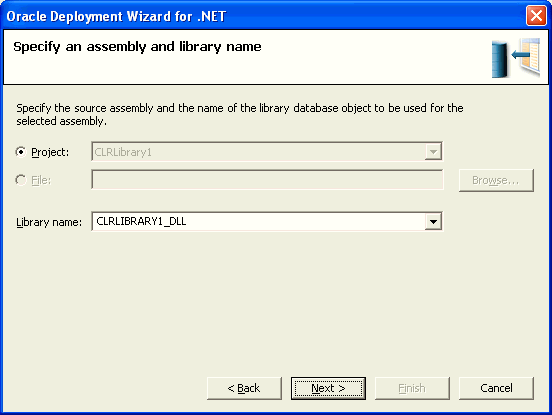
  6. The Specify an assembly and library name window appears.

    To specify the assembly, select the project from the drop-down list, or select File, and click Browse to navigate to the one you want.

    To specify the name of the library database object to be used for the selected assembly, accept the default, select the name from the drop-down list, or enter a new name.

    For this demonstration, accept the default project and library name and click Next.

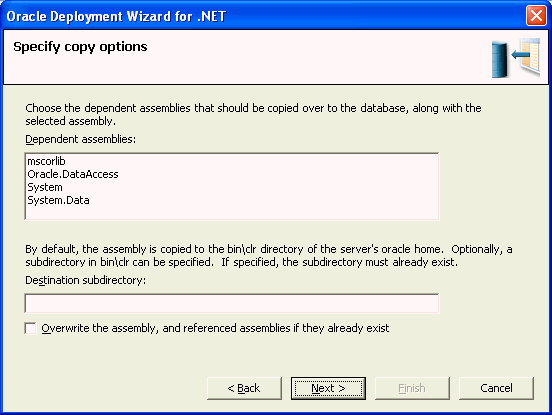
  7. The Specify Copy Options window appears.

    To specify the dependent assemblies to copy to the database, select them from the list. The list displays all possible dependent assemblies. In this case, the assemblies displayed have already been copied to the database and, therefore, there is no need to copy them. To deploy the assembly to a directory other than the default bin\clr directory, modify the destination path. The destination must be a bin\clr directory or one of its existing subdirectories.

    For this demonstration, do not select any dependent assemblies, and do not modify the destination path.

    If you want to, select Overwrite the file if it already exists in the database.

    Then, click Next.

Step 3: Choose the Function to Deploy

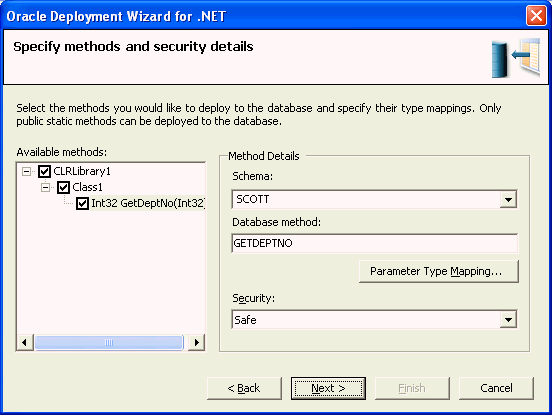
The Specify methods and security details window appears.

You can select the entire project to deploy, or expand it to deploy specific functions. Because there is only one function in this project, selecting any one item, checks the entire project. If there were more functions or procedures, you could select individual items to deploy.

If you want to select a different schema to deploy, you can do so here. If the schema you want is not listed, you need to apply different filters. For information on this process, see Oracle Developer Tools for Visual Studio Help.

You can set the security level using the drop-down list. The possible levels are:

  • Safe - (Default)

  • External

  • Unsafe

For this demonstration, do the following:

  1. Choose GetDeptNo() from the list of procedures and functions contained within that assembly.
  2. The schema initially says SYS. Change it to Scott, so that you can deploy it in the scott schema.
  3. Accept the default security level. You can either click Next to continue, or you can click Parameter Type Mapping... to view the type mappings.

Step 4: Determine the Appropriate Parameter Type Mappings

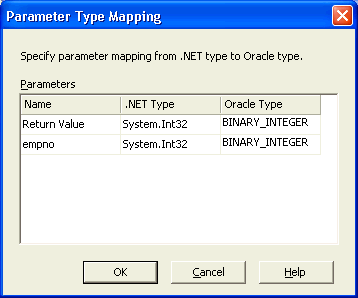
If you have selected Parameter Type Mapping..., the Parameter Type Mapping window appears, which allows you to change the data type, using the drop-down list.

For this demonstration, accept the default mappings of the .NET data type System.Int32 to the Oracle type BINARY_INTEGER.

Click OK to return to the Specify methods and security details window.

See Also:

"Data Type Conversion" for data type mapping tables

Step 5: Deploy the Function to an Oracle Database

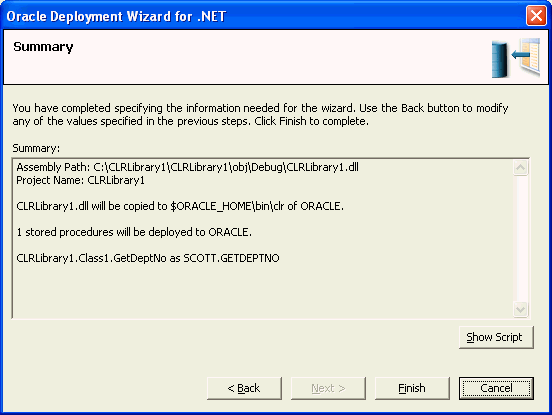
The Summary window of the Oracle Deployment Wizard for .NET appears, showing all the indicated specifications. This window permits you to modify any values by selecting Back.

To complete the demonstration, do the following:

  1. Review the summary.
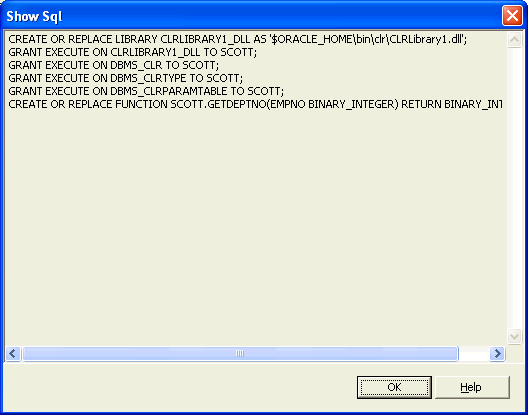
  2. To verify SQL commands, select Show Script.
  3. When the Show Sql window appears, review the code for the PL/SQL wrapper and click OK to return to the Summary window.
  4. Click Finish to deploy the GetDeptNo() function.

Step 6: Test the Function

At this point, GetDeptNo() function has been deployed to the Oracle Database and you are ready to test it by invoking the PL/SQL wrapper function.

You must be connected as the default user, scott, in this demonstration, to call the function.

Test the function by invoking it from the following tools:

Invoking from Oracle Developer Tools for Visual Studio

To locate and call the function from Oracle Developer Tools for Visual Studio:

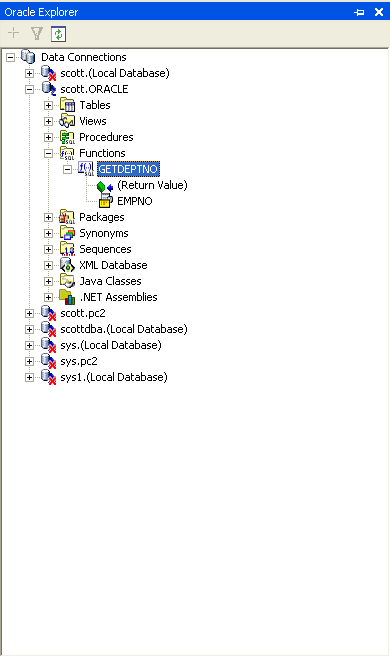
  1. From the View menu, select Oracle Explorer.
  2. Expand the Functions node.
  3. Locate GETDEPTNO.
  4. Right-click GETDEPTNO and from the menu, select Run.
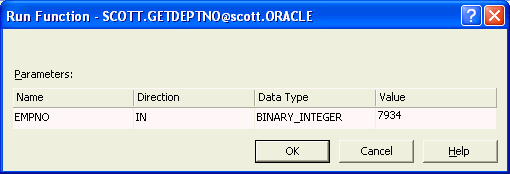
  5. When the Run Function dialog box appears, enter employee number 7934 as the input value.
  6. Click OK.

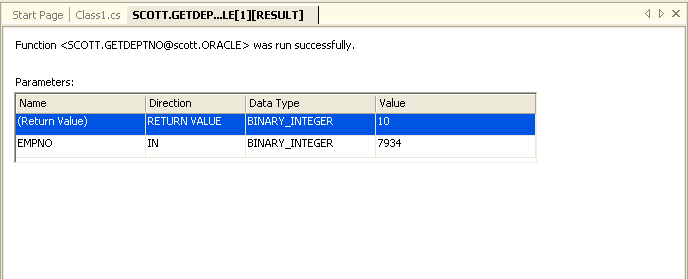
    The output value 10 appears in the Document Window, indicating that employee number 7934 belongs to department 10.

Invoking from ODP.NET client

The following code sample demonstrates how to invoke the PL/SQL wrapper for .NET function.

using System;
using System.Data;
using Oracle.DataAccess.Client;
 
namespace ODPNETClientApp
{
  public class Class1
  {
    public static void Main()
    {
      int empno  = 7934;
      int deptno = 0;
 
      try
      {
        // Open a connection to the database
        OracleConnection con = new OracleConnection(
          "User Id=scott; Password=tiger; Data Source=inst1");
        con.Open();
 
        // Create and execute the command
        OracleCommand cmd = con.CreateCommand();
        cmd.CommandType = CommandType.StoredProcedure;
        cmd.CommandText = "GETDEPTNO";
 
        // Set parameters
        OracleParameter retParam = cmd.Parameters.Add(":DEPTNO",
            OracleDbType.Int32, System.Data.ParameterDirection.ReturnValue); 
        cmd.Parameters.Add(":EMPNO", OracleDbType.Int32, empno, 
        System.Data.ParameterDirection.Input);
        
        cmd.ExecuteNonQuery();
        deptno = (int)retParam.Value;
 
        Console.WriteLine("\nEmployee# {0} working in department# {1}\n", 
          empno, deptno);
 
        cmd.Dispose();
        con.Close();
      }
      catch (Exception e)
      {
        Console.WriteLine(e.Message);
      }
    }
  } // Class1
} // ODPNETClientApp namespace
Invoking from SQL*Plus

To invoke the GetDeptNo() function .NET function from SQL* Plus:

  1. Start SQL*Plus and log in as user scott with the password tiger.
  2. Enter the following commands:
    SET SERVEROUTPUT ON;
    DECLARE
    deptno BINARY_INTEGER;
    BEGIN
      deptno := GetDeptNo(7934);
      DBMS_OUTPUT.PUT_LINE(deptno);
    END;
     

Alternatively, you can execute following statement:

SELECT GetDeptNo(7934) FROM DUAL;