Create Projects and Workspace

A project is a container for your notebooks, and a workspace is a container for your projects. While you may own many projects, other workspaces and projects may be shared with you.

The initial workspace and the default project is created by the Oracle Machine Learning service automatically when you log in to Oracle Machine Learning for the first time. To create a new project and a workspace:
  1. On the top right corner of Oracle Machine Learning home page, click the project workspace drop-down list. The project name and the workspace, in which the project resides, are displayed here. In this screenshot, the project name is USER1 Project, and the workspace name is USER1 Workspace. If a default project exists, then the default project name is displayed here.

    Note:

    The last project that you have worked on is stored in the browser cache and is the default project. If you clear the cache, then no default exists and you must select a project.
  2. To create a new project, click New Project.

    Figure 2-1 Project Workspace Drop-down

    Project Workspace Drop-down
    The Create Project dialog box opens.
  3. In the Create Project dialog, enter the following:

    Figure 2-2 Create Project Dialog

    Create Project Dialog
    1. Name: Enter a name for your project.
    2. Comments: Enter comments, if any.
    3. Workspace: By default, the default workspace is selected. To choose another workspace or create a new workspace, click the down arrow and select a workspace.
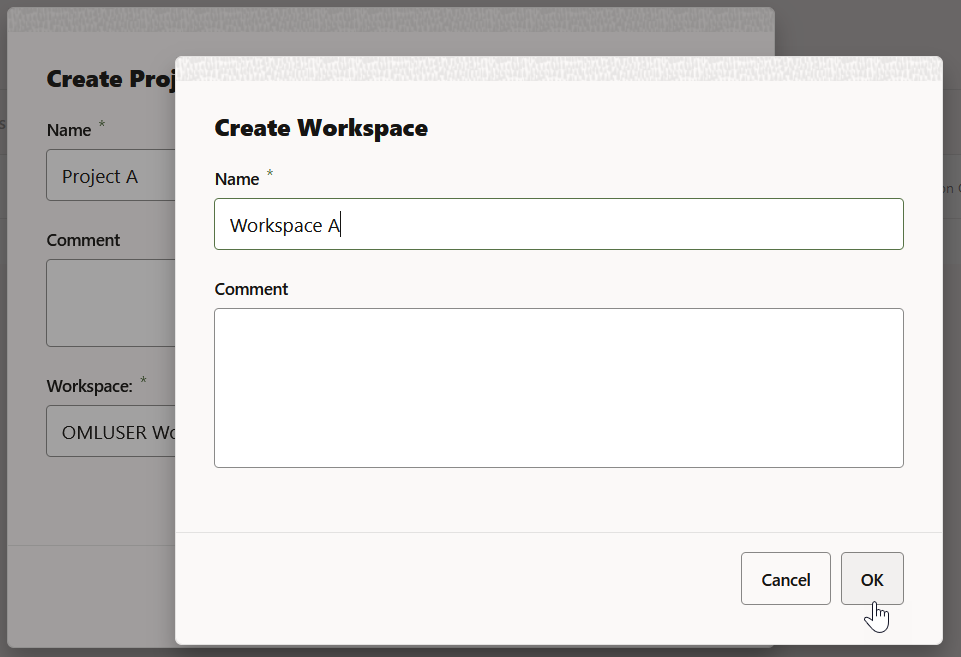
  4. To create a new workspace, click add icon next to the Workspace field in the Create Project dialog. The Create Workspace dialog opens.

    Note:

    You can also create a workspace by clicking Create in the Select Project dialog.
  5. In the Create Workspace dialog box, define the new workspace:

    Figure 2-3 Create Workspace Dialog

    Create Workspace Dialog
    1. Name: Enter a name for your workspace.
    2. Comment: Enter comments, if any.
    3. Click OK.
    This creates your workspace, and navigates back to the Create Project dialog box. The project that you are creating is now assigned to the newly created workspace.
  6. Click OK.
  7. To select a different project inside another workspace, click Select Project in the project workspace drop-down list.
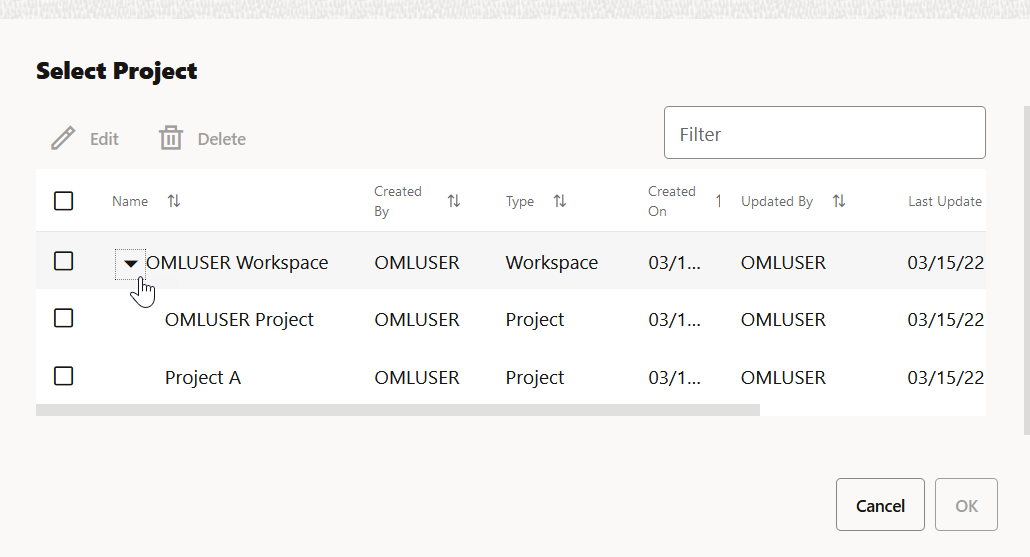
  8. In the Select Project dialog, expand Workspace to view the projects listed in it and then click the project you want to access.

    Figure 2-4 Select Project Dialog

    Select Project Dialog
    The Select Project dialog lists the workspace and all the projects in it, along with the following information:
    • Name
    • Created By
    • Type
    • Created on
    • Updated By
    • Last Update
    • Comments
    You can sort, edit, and delete projects here.

    Note:

    To delete workspaces, click Manage Workspaces in the project workspace drop-down list.
The project Project A is created and assigned to the workspace Workspace A . The screenshot in this example displays two workspaces - USER1 Workspace and Workspace A with one project in each workspace.

Related Topics